Overlay
The Overlay page explains the video-overlay tools available on the Player page for recorded-file playback.
Use overlays when you want to draw metadata directly on top of the current frame instead of inspecting it only in the KLV windows.
Where You Use It
Open the Player page after Process completes.
Use the Overlay button in the Player toolbar to show or hide the overlay control panel. The panel lets you:
- turn
Orientationon or off - turn
VMTIon or off - adjust each visible overlay layer's opacity independently
The overlay panel is shown on top of the video viewport and keeps its last visibility and layer selections between sessions on the same machine.
🧭 Orientation Overlay
The Orientation overlay is the compass-style indicator shown in the top-right corner of the Player viewport.
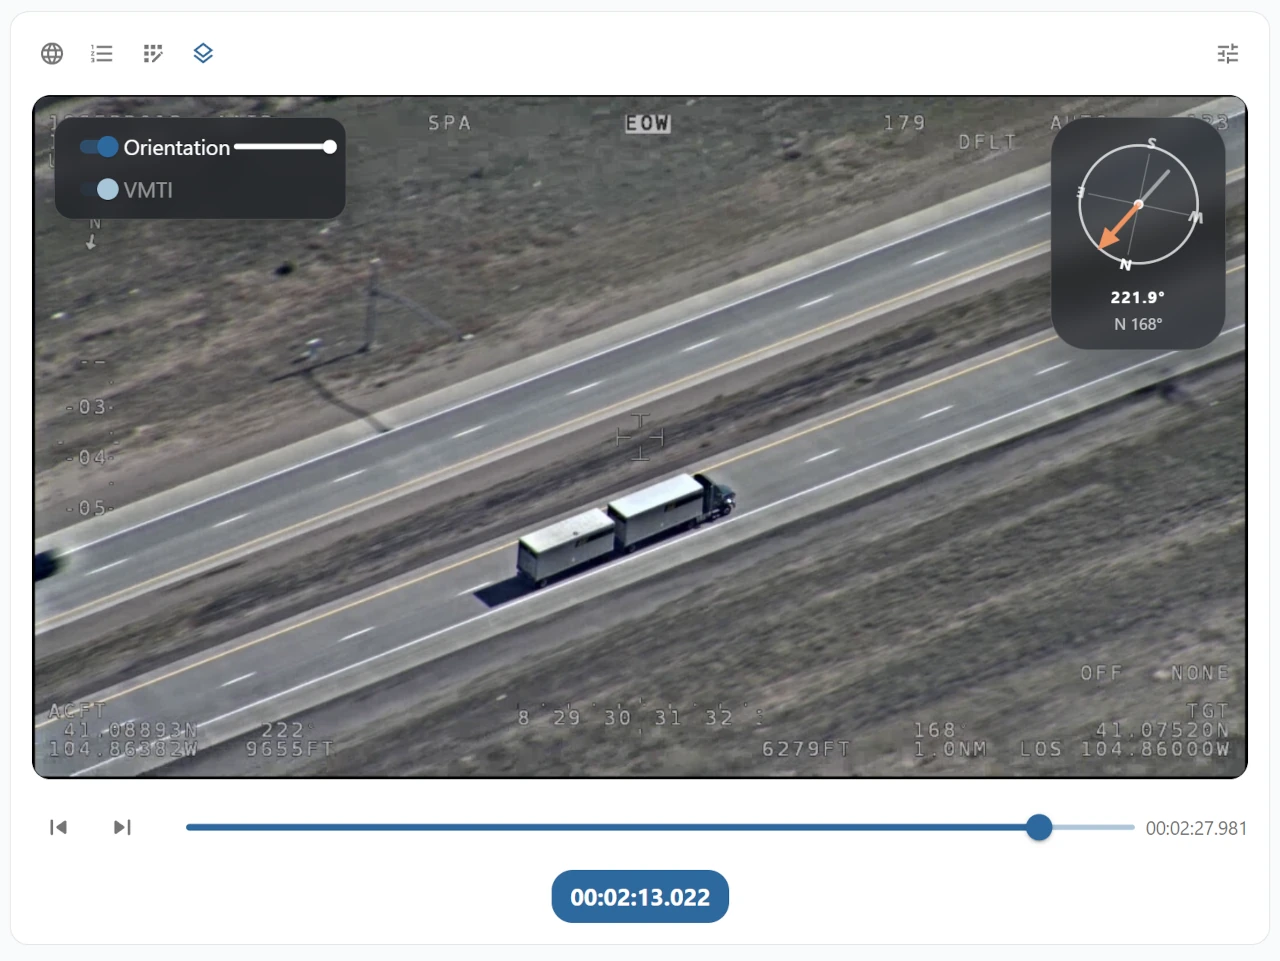
It combines two kinds of orientation information when available:
- platform heading, shown by the orange heading arrow
- terrain orientation, shown by the rotated
N/E/S/Wcardinal frame
Orientation Data Sources
The platform heading is taken from MISB ST 0601 Platform Heading Angle:
- Tag
5
The terrain orientation is derived from KLV position fields. StInspector first tries to compute it from the image corner geometry:
- full corner latitude and longitude fields: Tags
82to89 - or offset corner fields: Tags
26to33, together with frame center Tags23and24
If corner data is not available, StInspector falls back to a line from the sensor position to the frame center:
- sensor latitude and longitude: Tags
13and14 - frame center latitude and longitude: Tags
23and24
If Orientation Data Is Missing
The Orientation switch is available only when at least one of these values can be resolved:
- platform heading
- terrain orientation
If neither value is available in the matched metadata for the current frame:
- the
Orientationoverlay is not drawn - the
Orientationswitch is disabled in the overlay control
If only one value is available, the overlay still appears and uses the data that is present.
🎯 VMTI Overlay
The VMTI overlay draws detected targets directly on the video frame.
Depending on the metadata available for a target, StInspector can show:
- bounding boxes
- centroids
- contours
- filled mask runs
Each target is drawn using the target color when that value is present. If no usable target color is provided, StInspector falls back to a default overlay color.
VMTI Data Sources
The VMTI overlay uses the embedded MISB ST 0903 VMTI local set carried in MISB ST 0601:
- parent ST 0601 Tag
74
Inside that VMTI local set, StInspector needs frame dimensions before it can place targets on the video:
Frame Width: Tag8Frame Height: Tag9
It then looks for target geometry in the VMTI target data, including:
- bounding-box pixels
- centroid row and column or centroid pixel
- contour points from the target mask
- bit-mask run data
Only targets with usable on-screen geometry are drawn.
If VMTI Data Is Missing
If the matched packet does not contain usable VMTI data for the current frame, the VMTI overlay is unavailable.
That includes cases where:
- no embedded VMTI local set is present
- frame width or frame height is missing
- target entries exist but do not contain usable drawable geometry
When that happens:
- no VMTI targets are drawn
- the
VMTIswitch is disabled in the overlay control
Additional VMTI Configuration
The Player overlay control is intended for quick on-frame viewing changes.
More VMTI controls are available in the Player Config dialog:
VMTItab- target border width
For Player workflow details, see Player. For KLV inspection details, see KLV.